A brush wash needs time to dry
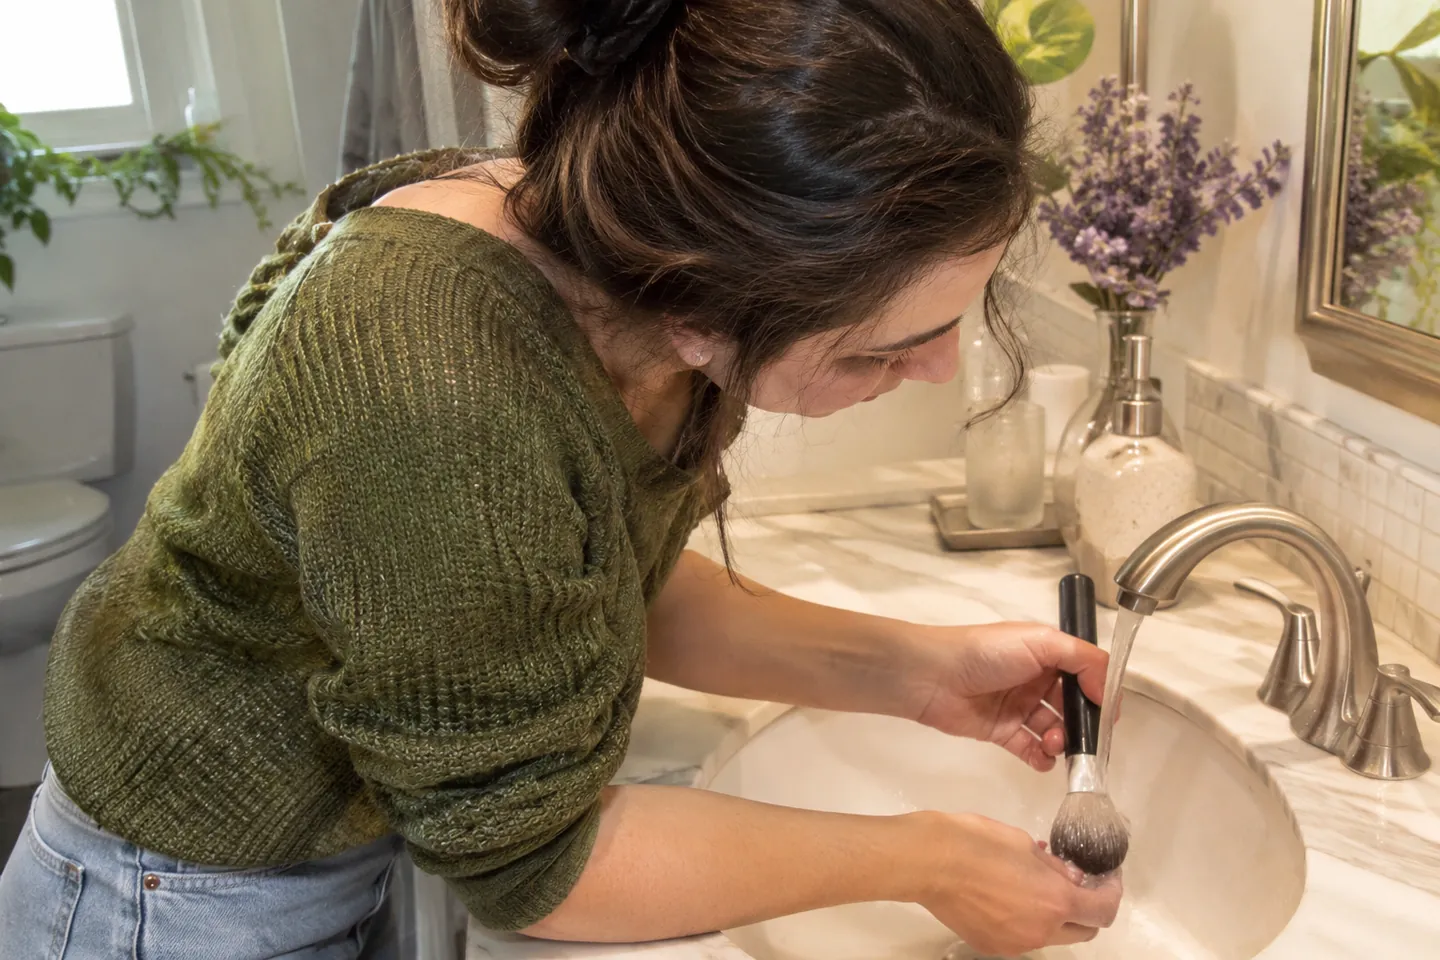
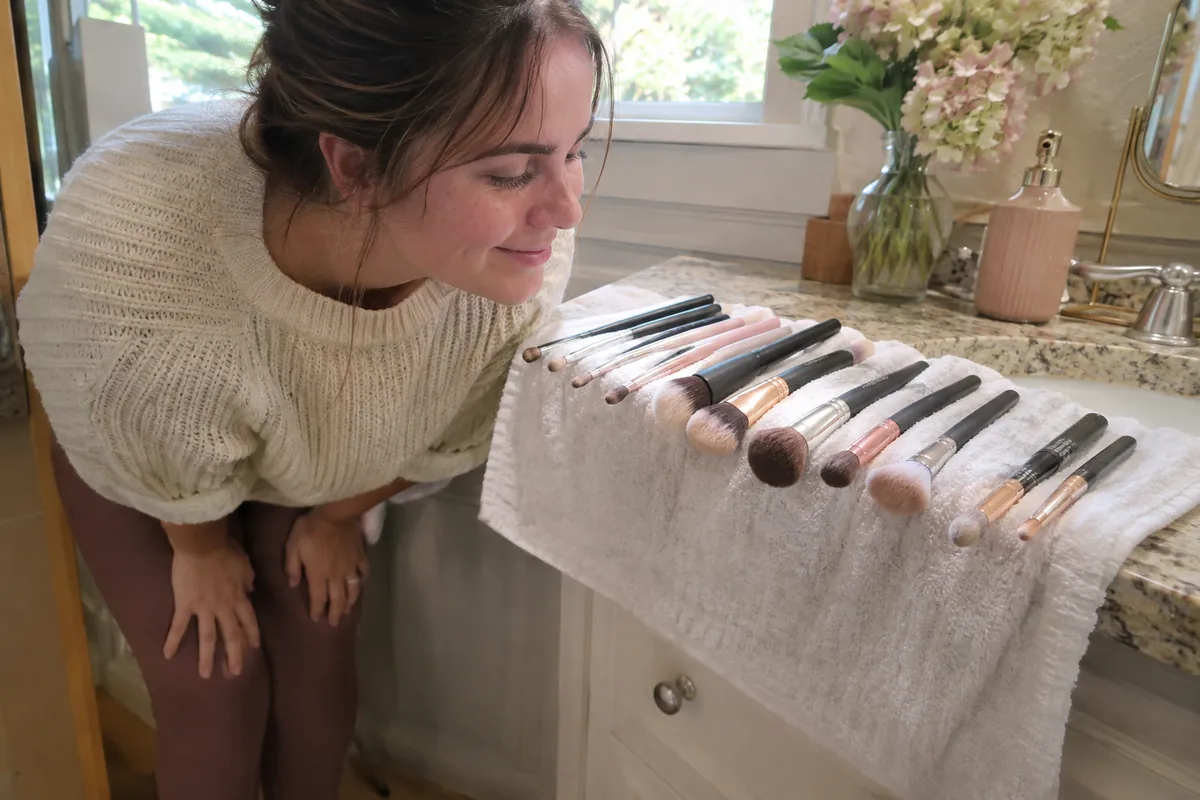
To clean makeup brushes, wash the bristle tips with lukewarm water and a suitable gentle cleanser, rinse thoroughly, squeeze out moisture and leave them flat to dry with the tips extending over an edge. Keep water away from the handle connection. Let the brushes dry completely before using or storing them.
The overlooked part is often timing. A brush washed just before you leave may still be damp when you need it. Plan the wash after your last application of the day, and leave a clean, dry alternative available if you need makeup again before it has dried.
Gather a small washing kit
You need lukewarm running water, a cleanser suited to the brushes, a clean towel or paper towel and a clean drying surface. Read the brush manufacturer's care instructions, especially for unusual fibers, glued parts or a specialized brush shape.
A silicone mat is optional. Your palm can help work the cleanser through the tips without buying another accessory. Avoid scrubbing so hard that the bristles spread into a shape they cannot recover from. Wash one brush at a time so you can see whether residue is still coming out.
Wash and rinse in six steps
The American Academy of Dermatology's method uses lukewarm water and gentle or clarifying shampoo. Its instructions focus on the tips because soaking the whole head can weaken the glue that holds the brush together.
- Rinse the tips to loosen makeup. Keep the handle connection out of the water.
- Work the appropriate cleanser gently through the bristles, using the product's directions.
- Rinse under running water. Repeat the cleansing stage if visible makeup or lather remains.
- Squeeze out excess water gently with a clean towel. Avoid twisting the brush head.
- Reshape the tips and lay the brush flat, with its bristles extending beyond the edge of a clean counter.
- Leave it until fully dry. Do not stand a wet brush upright or seal it inside a pouch.
This is a household cleaning routine. It is not a validated sterilization process, and a brush looking clean does not prove it is sterile. Professional makeup services need their own appropriate hygiene procedures between clients.
Choose frequency before the brushes look dirty
The AAD recommends washing makeup brushes every seven to ten days. Its separate guidance on cosmetics and tools recommends cleaning makeup sponges after every use and avoiding shared makeup and tools.
Put a recurring brush-wash day into the routine you already have. If a brush picks up unwanted color or product between washes, clean it sooner according to its care instructions. Do not wait for a visible stain to decide whether a tool needs attention.
For a simple kit, sort tools into “ready to use,” “needs cleaning” and “drying.” Keep those groups separate. That small distinction prevents a used brush from returning to the clean cup just because you were in a hurry.
Work out drying before your next application
A dense foundation brush may take longer to dry than a small eye brush. Room conditions and construction affect the time, so use complete dryness as the check rather than a fixed number of hours.
For example, if you wash brushes after Sunday makeup and need them early Monday, inspect them before relying on them. If any are still damp, use an appropriate clean alternative or simplify the application. A second brush is useful only if it solves that real scheduling problem; you do not need to buy a duplicate of every shape.
Our low-maintenance morning routine can help you reduce the number of tools you need at once. The aim is a kit you can keep ready, rather than a larger collection that makes washing harder to organize.
Avoid shortcuts that create a different problem
Do not soak handles in a sink and assume a longer soak is better. Do not dry brushes with direct high heat unless the manufacturer expressly permits the method. A fast surface wipe can remove color, but it should not be described as equivalent to every full wash or as sterilizing a brush.
Rinse-free products differ. Check which materials they are intended for, whether they need rinsing and how long the maker says to wait before use. Follow their safety instructions rather than substituting household disinfectants or mixing cleaning products.
Ulta's washing guide and L'Oréal's tool-care guide also discuss keeping water away from the handle connection and drying flat. For frequency and health-related advice, the AAD is the reference used here.
Keep the clean kit clean
Once dry, store brushes where their tips will stay protected from dust, spills and pressure. Wipe residue from the outside of the storage container using a method appropriate to its material, and let it dry before replacing the brushes. Putting a clean brush into a dirty, damp cup defeats the practical benefit of the wash.
For an evening look, set aside the brushes you need before beginning. A clean blending brush avoids dragging yesterday's dark pigment into a lighter shade; see the soft smoky-eye tutorial. For a workday kit, carry only dry tools and keep used ones apart until you can clean them.
If makeup appears to cause persistent irritation or breakouts, ask a dermatologist rather than assuming that more frequent brush washing will solve it. Clean tools support a sensible routine; they do not diagnose or treat the cause of a skin problem.
Clean tools do not renew an old product
Washing a brush helps maintain the tool; it does not reset the opening date or safety of the makeup used with it. Check the product’s label and discard it if the color or smell changes. Keep eye products separate from a general brush-cleaning schedule. The makeup replacement guide explains what an opening-date record can and cannot establish.
Is the storage pouch ready for clean brushes?
Finish drying the brushes and check the pouch separately before putting them away. Washing the tool does not remove a foundation spill from the lining, and cleaning the bag does not dry a brush. Keep those two tasks distinct so a completed wash does not become a rushed repack.
| Situation | Next action |
|---|---|
| Brush is still damp | Continue its permitted drying step outside the pouch |
| Pouch has loose residue | Empty it and check its care instructions |
| Both are dry and ready | Keep used tools separate from cleaned ones |
The makeup bag cleaning guide adds a lining, outer-surface and trim check. Do not transfer a brush-cleaner recipe to the bag simply because the same cosmetic marked both.
Identify a tanning tool before borrowing the makeup-brush routine
A brush sold for tanning may have different care directions from the powder or foundation brushes in your kit. Record its model and intended formula instead of choosing a wash method solely because the head looks familiar. Handle materials, assembly and the maker’s drying directions matter as well as the visible bristles. A cleaning method for one cosmetic tool is not a universal instruction for all of them.
Separate the formula remaining on the tool from the formula still developing on skin. Washing an applicator does not define the user’s rinse schedule. If you switch from a prepared mousse to drops mixed with moisturizer, read the new application directions and the tool’s care directions independently. Set aside anything that is damaged or not ready for use while you check its instructions. A clean-looking head alone does not prove that the full assembly is intact or that every trace of product has been removed. The mousse-versus-drops guide separates preparation, tools and timing.
Before putting the brushes away
0 of 5 done
Questions people ask
How often should I wash brushes?
AAD recommends every seven to ten days. Clean sooner when needed, and follow the tool’s own care instructions.
Can I stand them upright to dry?
Keep wet brushes flat with the tips extending over an edge. Store upright only after they are fully dry.
Is a clean-looking brush sterile?
No. Household washing is not a validated sterilization procedure. Professional services need appropriate hygiene procedures for their tools.
Sources and further reading
Sources checked 2026-10-26.